NSFW warning for further down this page
Let’s take our shader and add in some new features: melanin and hemoglobin masks.
Using these masks will enable us to:
- Add in tan lines (farmers’ tan, swimsuit tans)
- Mask areas for less melanin pigmentation, such as palms and soles of feet
- Add in support for vitiligo to increase diversity in your project further
- Add in blushing areas to expressions, which we can drive through blend shapes.
Melanin Masks
Melanin masks are the most straightforward. We need a greyscale mask that defines area of darker skin, and areas of lighter skin. We then sample a second set of fracitonal and blend values – so we have a skin colour for lighter areas and a skin colour for darker areas.
We first need to define what we’re masking
We could have a single mask for all tan types, i.e. you either have a mask for natural pigmentation (palms, soles of feet) or your mask contains areas for tan lines. It is unlikely you want both, as a higher natural melanin fraction lends itself less to tan lines.
For the purposes of this tutorial, we’ll use a single mask for some tan lines, but you can expand this further if you want.
We’ll therefore need a one-channel mask – one for natural pigmentation and one for tan lines. I have prepared some content for you here:
Direct Download:
<todo: retrieve link… lost in a wordpress upgrade>
Import it into our Digital Human project. In here, find open up the level Female_Tan. You will find some materials already set up with our pigmentation work from earlier.
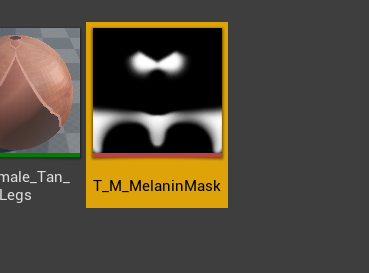
In the content I have provided, you will also see a few materials, and the following mask for tan lines:
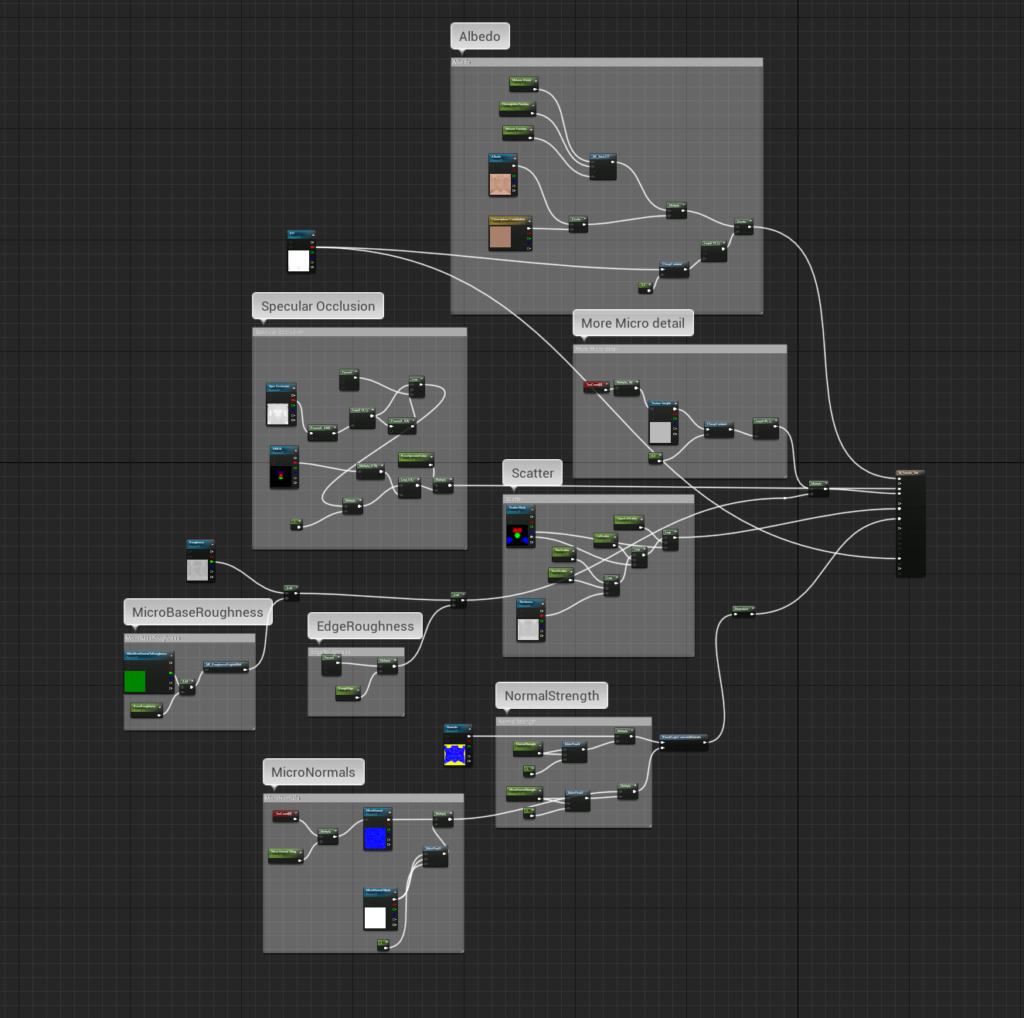
Open up the M_Female_Tan material. This is our Master Material that the different body sections inherit from, so changes here propagate to all the skin parts. It should look like this:
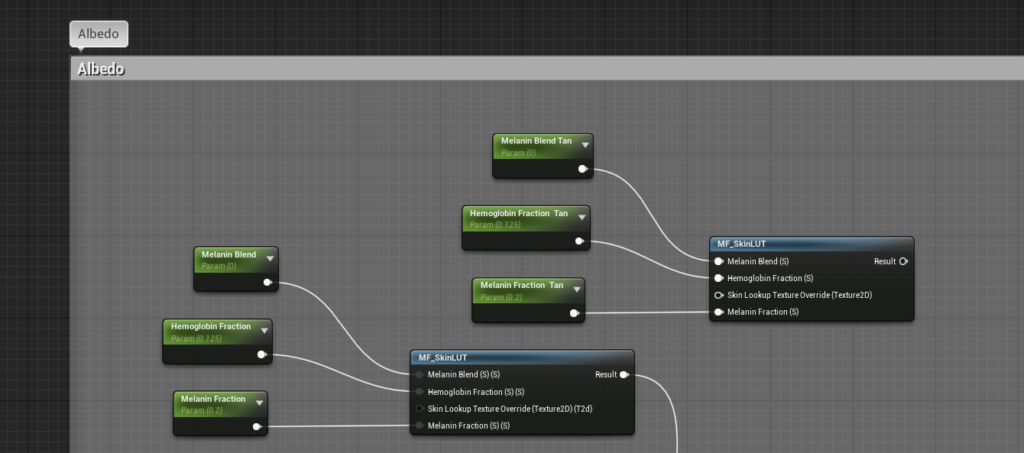
Duplicate the recolor section in the Albedo area, double up the Input variables and rename the input scalar parameters as follows:
Next, drop in our a Texture Variable, use the T_Black_Linear texture here as most body parts don’t need a texture here, and this is our default. Take the R (red) channel and drag this into a lerp node as input Alpha.
We’ll set the Tan values to be input A (as tanned areas are black on our mask) and the base values to be Input B (as these are white):
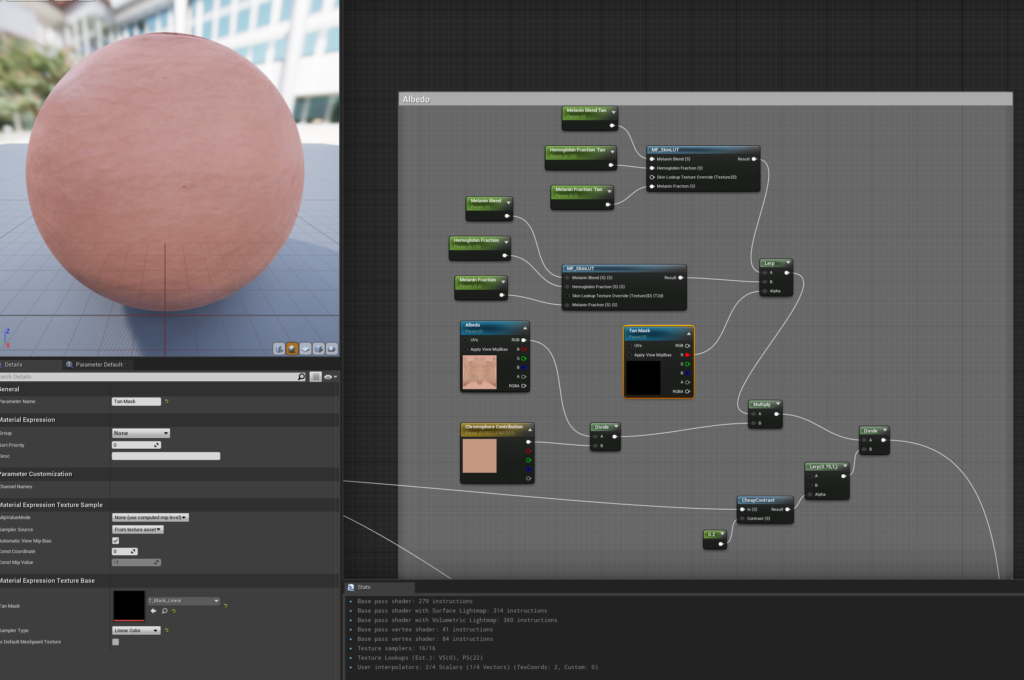
Now test your results on M_Female_Tan_Body by assigning our T_Melanin_Mask into the appropriate texture input:
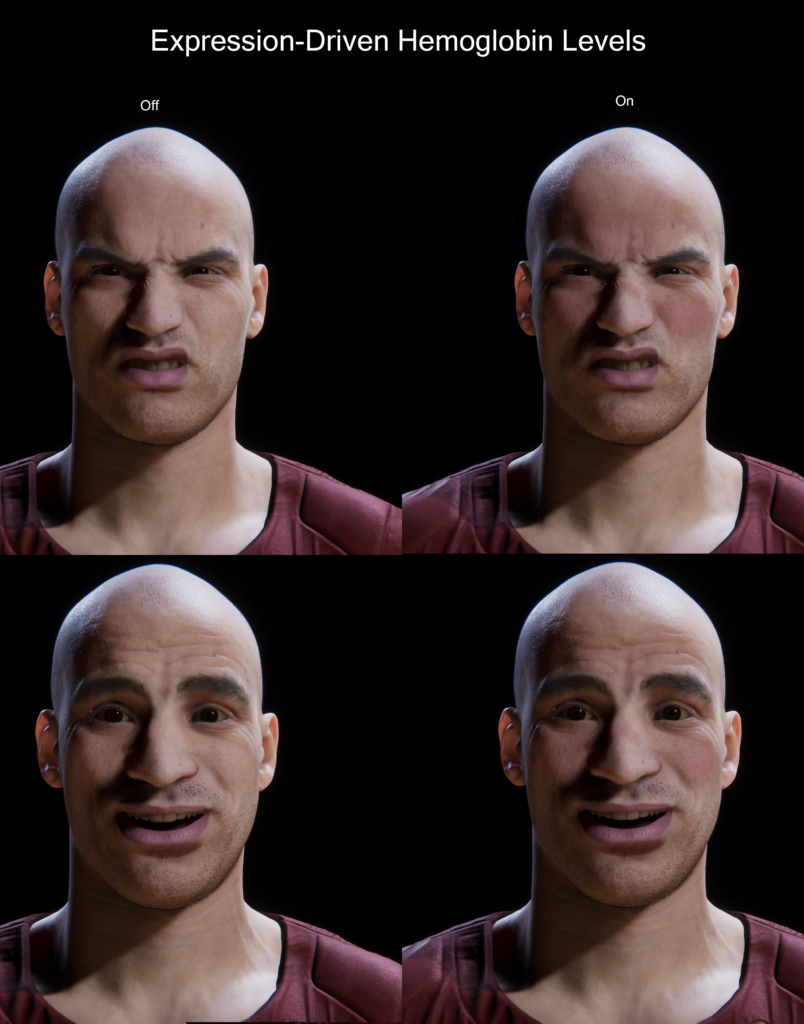
Hemoglobin Masks
I wanted to use UE4 for this page, to keep things consistent. Unfortunately, I’ve been unable to source assets I can share that are high-quality, contain an ability to create facial expressions easily and are free. This is currently a one-person outfit and I don’t have the resources to make such assets in a reasonable time frame. This principles in UE4 remain the same, however.
As such, of this part, we’ll be using the Digital Human Asset from the Unity Asset Store and Unity 2019.3+. Apologies for the switch, but it is necessary here (for my sanity) and never hurts to learn multiple engines for new techniques!
You can get it here:
<todo: again, need to get these links back>
For this, we want to generate some masks that are associated with different emotions or expressions.
The digital human pack provided by Unity allows for a variety of facial expressions. Unfortunately, its implementation is rather obtuse for our needs, so directly driving hemoglobin levels, while possible, will add pages to this already lengthy tutorial.
Instead, we’ll use sliders to drive a couple of hemoglobin masks to demonstrate how we can use them.
I have already got our basic implementation from the previous page included. Grab these files and add them to the Digital Human project mentioned above:
Direct Download:
To start off, you can find this texture in the assets I have provided:
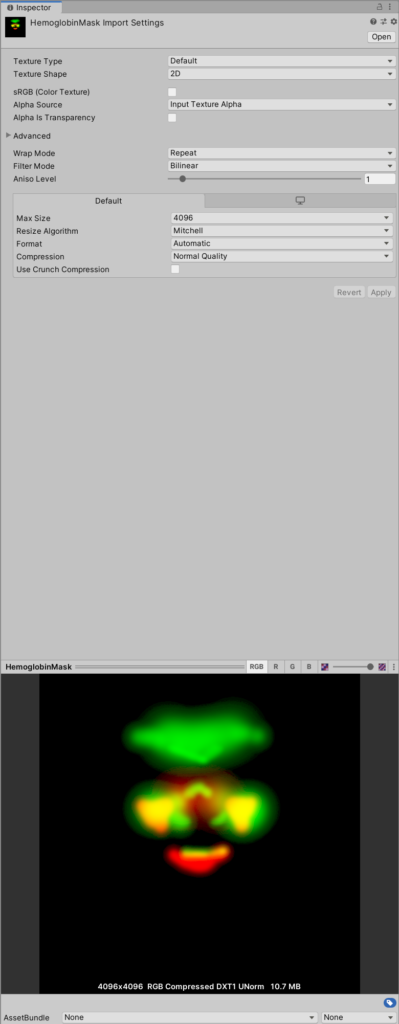
The red and green channels contain slightly different hemoglobin masks for the face.
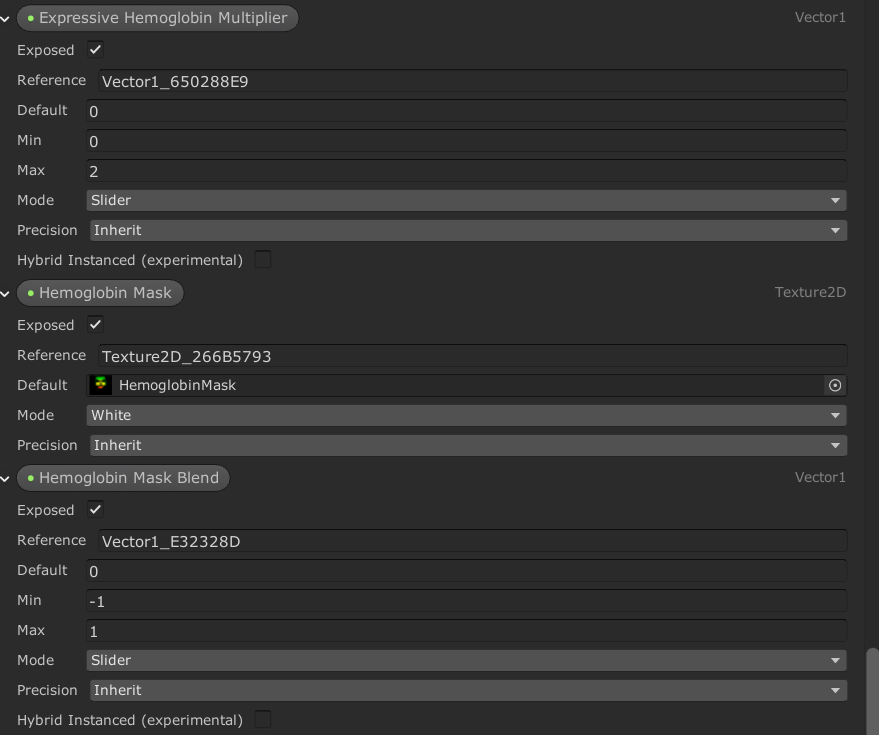
The first step is to add these varibales to the DigitalHuman_Skin_LUT shader graph:
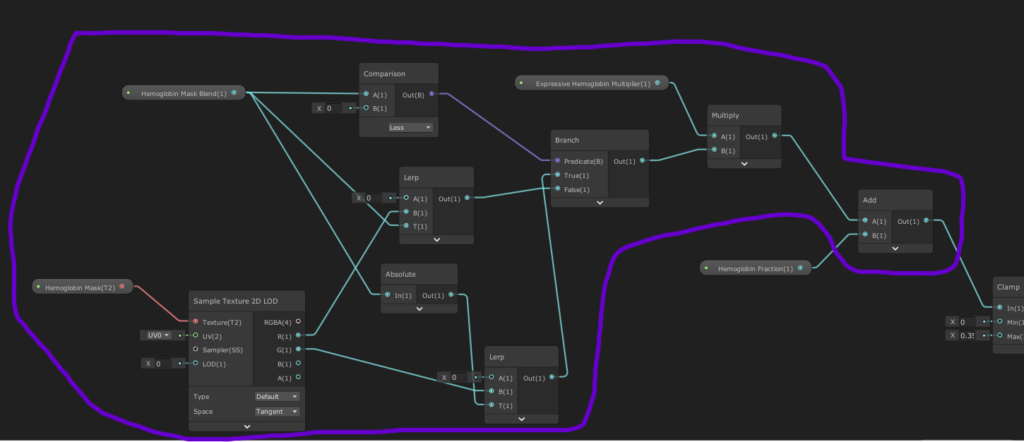
Then add this logic the Hemoglobin Fraction value:
Compile, then make sure you add the Hemoglobin Mask to the Gawain_Skin material.
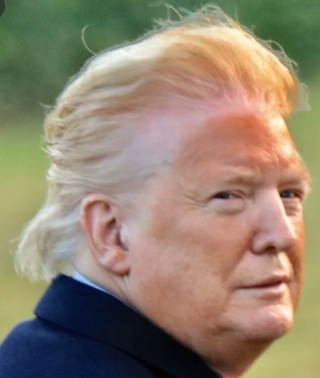
Select a pale skin tone and overdo the hemoglobin to see it:
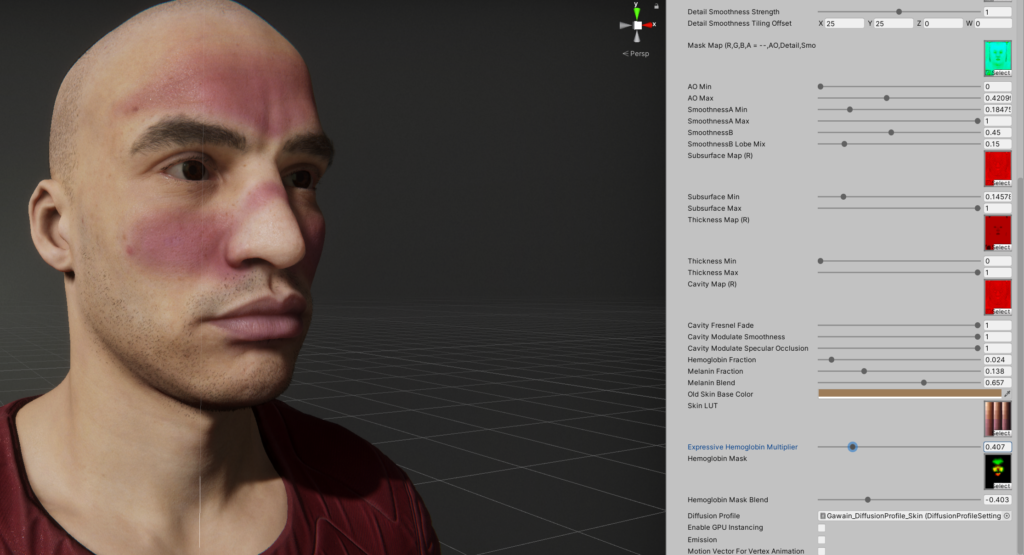
Now, you can play with the expressions to get some more results:
You can grab both projects, in their entirety, here:
<todo: come back and fix>