[I’m improving this page, WIP]
There are plenty of ways to get up to speed with an IDE for developing Maya tools & plugins. Anecdotally, I’ve found not many studios enforce a particular IDE for Maya development, so this is how I’ve usually got mine configured.
Prerequisites
- An IDE – I use Visual Studio, but VS Code & Eclipse work fine.
Getting Started
Once you’ve installed those tools, locate where you installed Qt to, and find this application:
~\Qt\Qt5.6.1\5.6\mingw49_32\bin\designer.exe
Put a shortcut to this on your Desktop (or wherever). You can run this to build Maya-compatible .UI files
Next, run Maya and run this command in Python:
import maya.cmds as cmds
cmds.commandPort(name=":7001", sourceType="mel")
cmds.commandPort(name=":7002", sourceType="python")
You can, if you wish, add this to you userSetup.py/userSetup.mel file in your Maya scripts path.
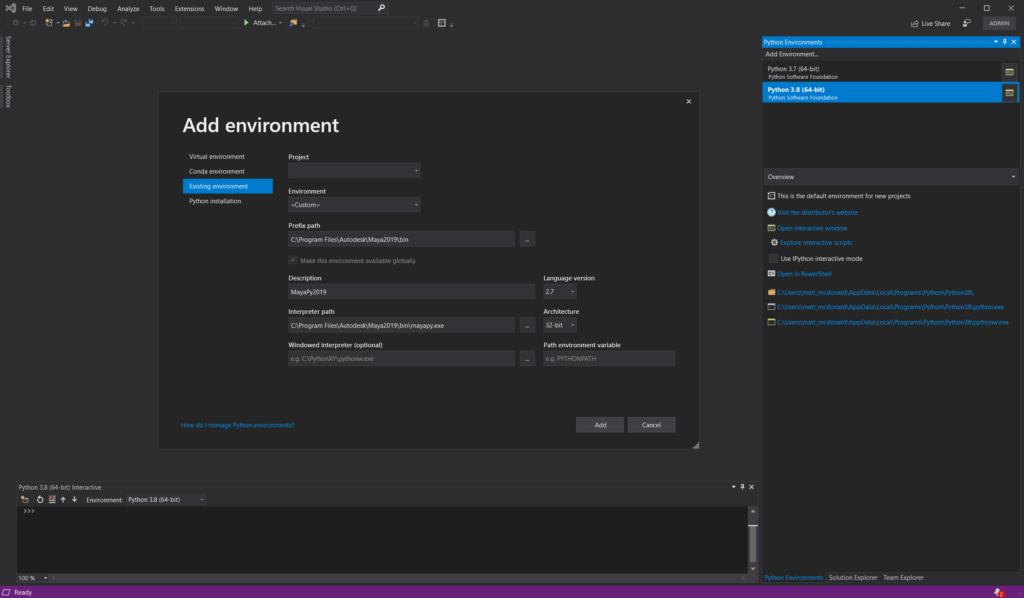
I also head into VS and add in the Maya Python paths, so you get all the Maya-specific PyMEL commands. You can do this by adding Maya’s python interpreters to a new environment:

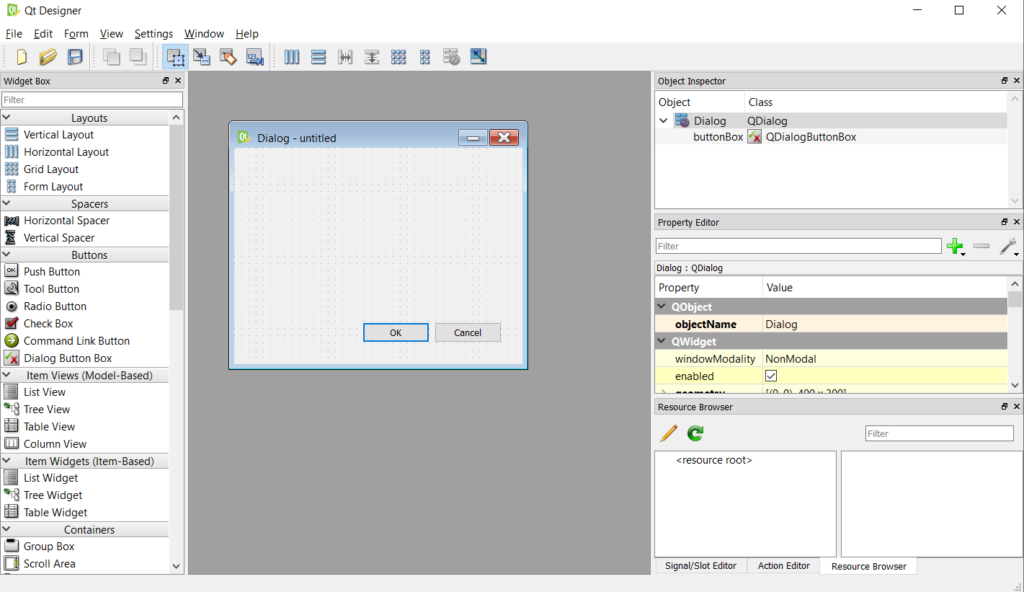
Open up Designer and make yourself a basic UI, like so:

Save this as “MyCustomUiFile.ui” in:
C:\Users\<username>\Documents\Maya\<maya version, i,e, ‘2019’>\scripts\
Now, you can use the following termplate to open the UI and hook up events:
import os
import sys
import site
from PySide2.QtCore import SIGNAL
try:
  from PySide2.QtCore import *
  from PySide2.QtGui import *
  from PySide2.QtWidgets import *
  from PySide2 import __version__
  from shiboken2 import wrapInstance
except ImportError:
  from PySide.QtCore import *
  from PySide.QtGui import *
  from PySide import __version__
  from shiboken import wrapInstance
from maya import OpenMayaUI as omui
from PySide2.QtUiTools import  *
from pymel.all import *
import maya
import maya.cmds as cmds
import pymel.core as pm
import pymel.mayautils as mutil

mayaMainWindowPtr = omui.MQtUtil.mainWindow()
mayaMainWindow = wrapInstance(long(mayaMainWindowPtr), QWidget)

windowId = "MyCustomUI"
USERNAME = os.getenv('USERNAME')

def loadUiWidget(uifilename, parent=None):
    """Properly Loads and returns UI files - by BarryPye on stackOverflow"""
    loader = QUiLoader()
    uifile = QFile(uifilename)
    uifile.open(QFile.ReadOnly)
    ui = loader.load(uifile, parent)
    uifile.close()
    return ui

class createMyCustomUI(QMainWindow):

    uiPath = "C:\\Users\\" + USERNAME + "\\Documents\\maya\\2019\\scripts\\MyCustomScript\\UI\\MyCustomUiFile.ui"

    def onExitCode(self):
        print("DEBUG: UI Closed!\n")

    def __init__(self):
        print("Opening UI at " + self.uiPath)
        mainUI = self.uiPath
        MayaMain = wrapInstance(long(omui.MQtUtil.mainWindow()), QWidget)
        super(createMyCustomUI, self).__init__(MayaMain)

        # main window load / settings
        self.MainWindowUI = loadUiWidget(mainUI, MayaMain)
        self.MainWindowUI.setAttribute(Qt.WA_DeleteOnClose, True)
        self.MainWindowUI.destroyed.connect(self.onExitCode)
        self.MainWindowUI.show()
        # You can use code like below to implement functions on the UI itself:
        #self.MainWindowUI.buttonBox.accepted.connect(self.doOk)
    #def doOk(self):
        #print("Ok Button Pressed")

if not (cmds.window(windowId, exists=True)):
    createMyCustomUI()
else:
    sys.stdout.write("tool is already open!\n")
That should at least get you going with a basic interface to work from.


