

If you’ve ever made translucent objects in Unreal Engine, or Unity (or just about any modern 3D engine), you’ll have possibly encountered this issue, where parts of your mesh render incorrectly infront or behind of itself.
Why does this happen?
The UE4 renderer will render all opaque objects to the various GBuffers first. When rendering opaque objects, UE4 writes to a Depth Buffer. The Depth Buffer stores depth information for each pixel (literally “depth from the camera” – a Depth Buffer value of 100 is 100 units from the camera). When rendering a new opaque object we can test the pixel’s depth against this buffer. If the pixel is closer, we draw that pixel and update the Depth Buffer, if it further away (i.e. “behind and existing pixel”), we discard it.
After rendering opaque objects, it then moves on to Translucent objects. The renderer works in a similar way – taking each object and rendering them, checking against the depth values already rendered by the opaque pass. This works fine for simple things such as windows, where you wont get a mesh with faces infront/behind. However, it breaks down under these circumstances.
This is because when given a mesh, the renderer tackles the faces by their index. This means it renders the triangle that uses vertices {0,1,2} first, then continues up the chain. This means it may render faces in an order that does not match the order they are in front of the camera. This means some faces are rendered in the wrong order. When rendering opaque objects, this isn’t a problem as every pixel it either fully occluded or not occluded – with Translucent objects, this isn’t the case and we get pixels that stack.

The CustomDepth buffer works identically to the Depth Buffer, aside from the fact that it only renders objects into the buffer that you define – including Translucent ones. By using this buffer and doing a simple check in our material, we can make pixels that are located behind other pixels in our mesh fully transparent, making them disappear.
One caveat: You will not see any parts of the mesh behind itself. I.e., if your mesh was made of two spheres, with one inside the other, you would not see the internal sphere rendered at all. Its a trade-off. There are other solutions to this problem, but this is the simplest and works in most cases.
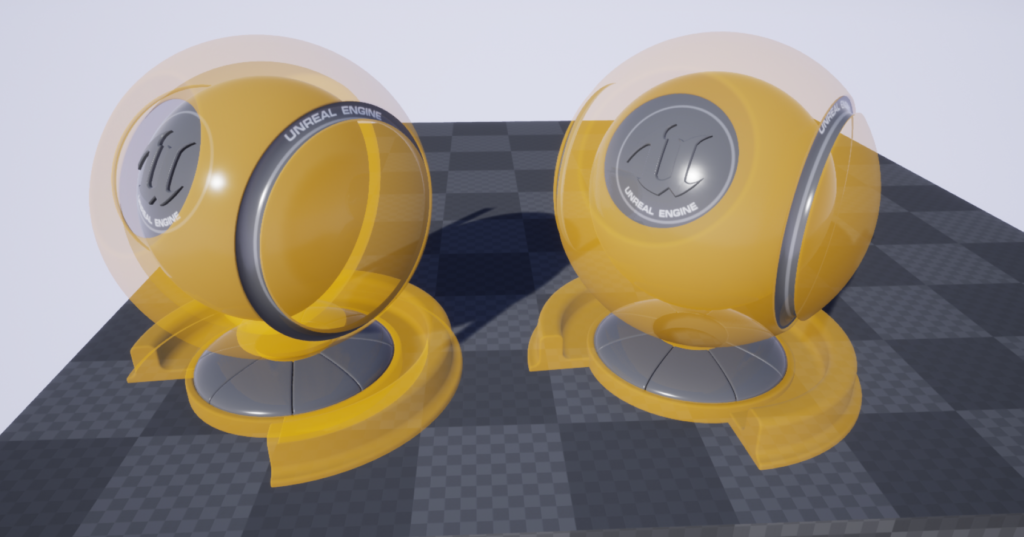
On the left we have the default Translucency. On the right we have sorted Translucency. As you can see, we can no longer see back faces – this may not be what you want.
Rendering to the CustomDepth Bufffer
Step 1 is to get your mesh and locate the “Render CustomDepth Pass” flag and enable it.
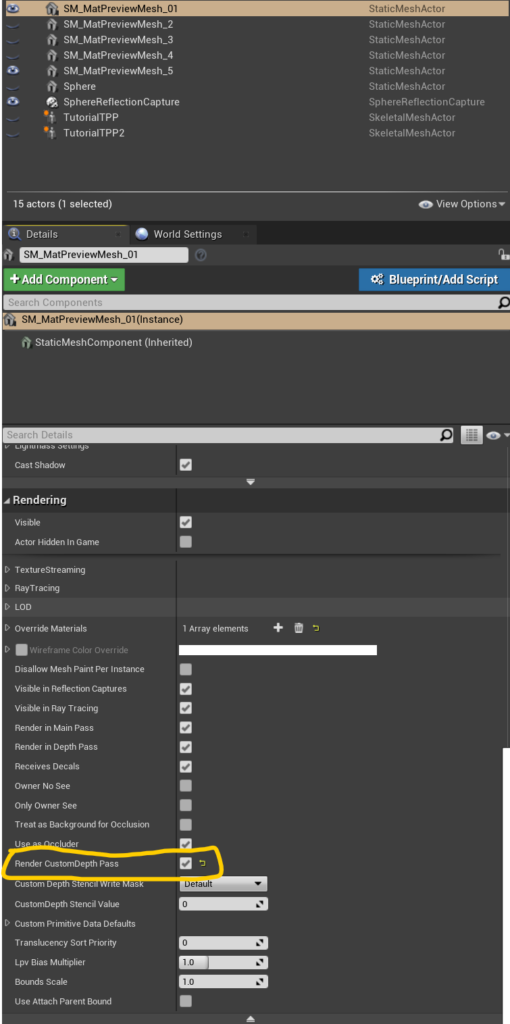
Expand Rendering and check this option
Secondly, you need to find your Material and enable the “Allow CustomDepth Writes” flag.
NOTE: There is a bug here. This flag is ignored if your Material is Opaque, even if your Material Instances are Translucent. To get around this, set your Material to Translucent, and make a Material Instance that is an Opaque version of that – use that for opaque objects, where you wish to share Material functionality.

I prefer to work in Material Functions using Material Attributes, but for easy-of-explaining, we’ll just put the logic for the following into the Material directly.
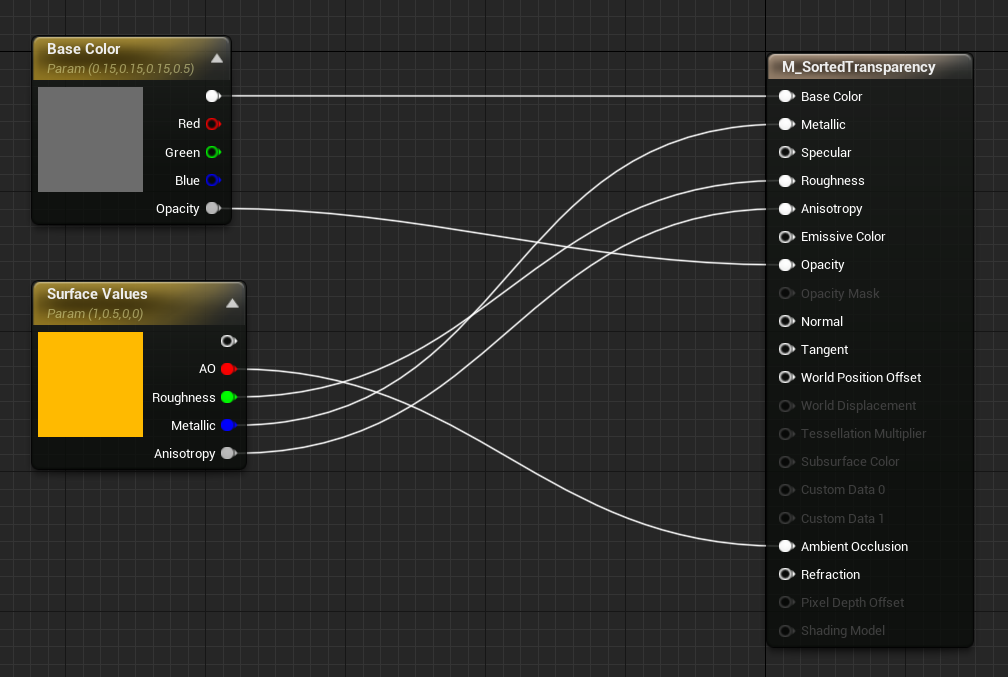
Here’s a simple material example.
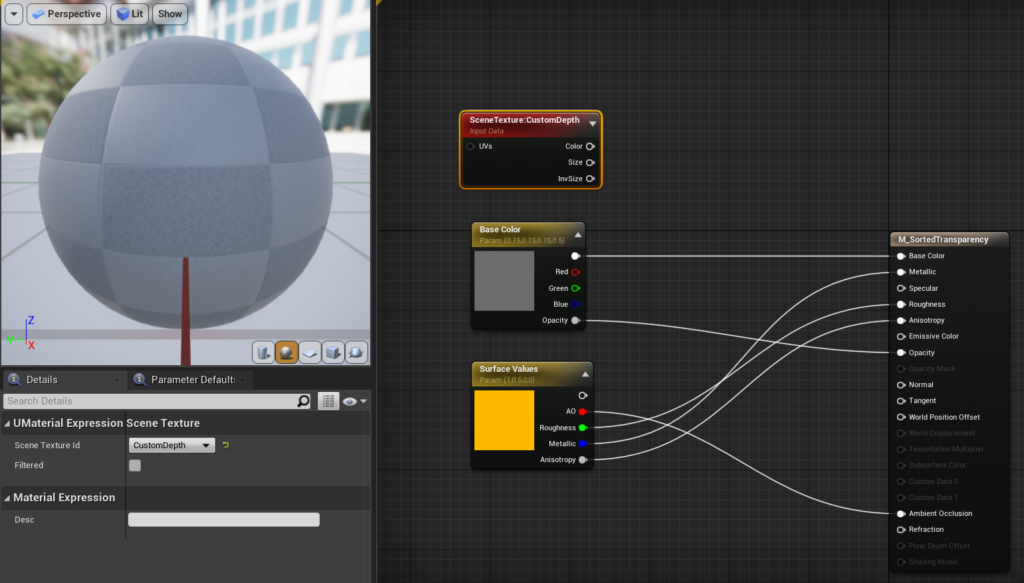
Create a new node for SceneTexture and set the SceneTexture to be CustomDepth:
Now we need a few more nodes. PixelDepth doesn’t work here as a comparison for CustomDepth. We need to reconstruct the depth using this method:
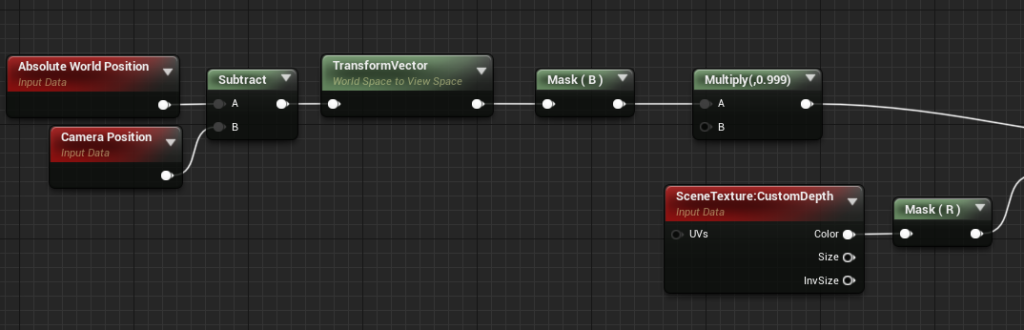
I believe you could use PixelDepth here, but simply add a tolerance value to it. Untested, but it’d probably work.
We feed this into an If node with our opacity and a constant value of 0
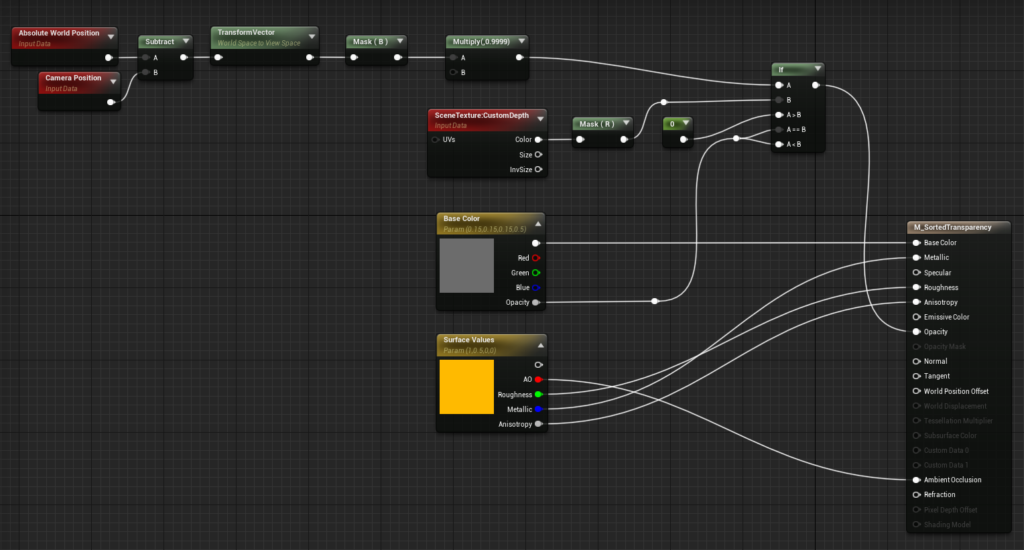
The Multiply by 0.999 is important here. This is the threshold – values of 1 or higher will make the mesh completely invisible. Less than 0.999 will create overlapping along edges.
Your mesh should now correctly sort!