Table of Contents
Setting Up
We now have an approach we can take. We will now turn this into a practical solution.
We first need to find a way assign a zone of our mesh to a bitmask value. For example, if you had a hand you were trying to split into different zones, you may choose one zone for each digit (fingers & thumbs), the top of the hand and the palm of the hand.
How can we tell our shader about these zones?
In vertex shaders we have access to a few things. Two common ways of attaching data to a single vertex is either using UVs or vertex colors.
UVs use coordinates – a pair of values. We only need one for now, so we can grab the x-component of the UVs and use that.
We could use vertex colors, but the tooling here would be a problem – it is easy to move a UV coordinate up or down, is is less easy to increase painted values by increments – at least in Maya. So in this case, we’ll stick with UVs.
The first thing we want to do is define the base zones to cull. We need to do this in our modelling package. I’ll walk you through how I set things up in Maya:
The UV Basics
First steps, then. Let’s change Maya’s grid settings in the UV editor to be useful to us.
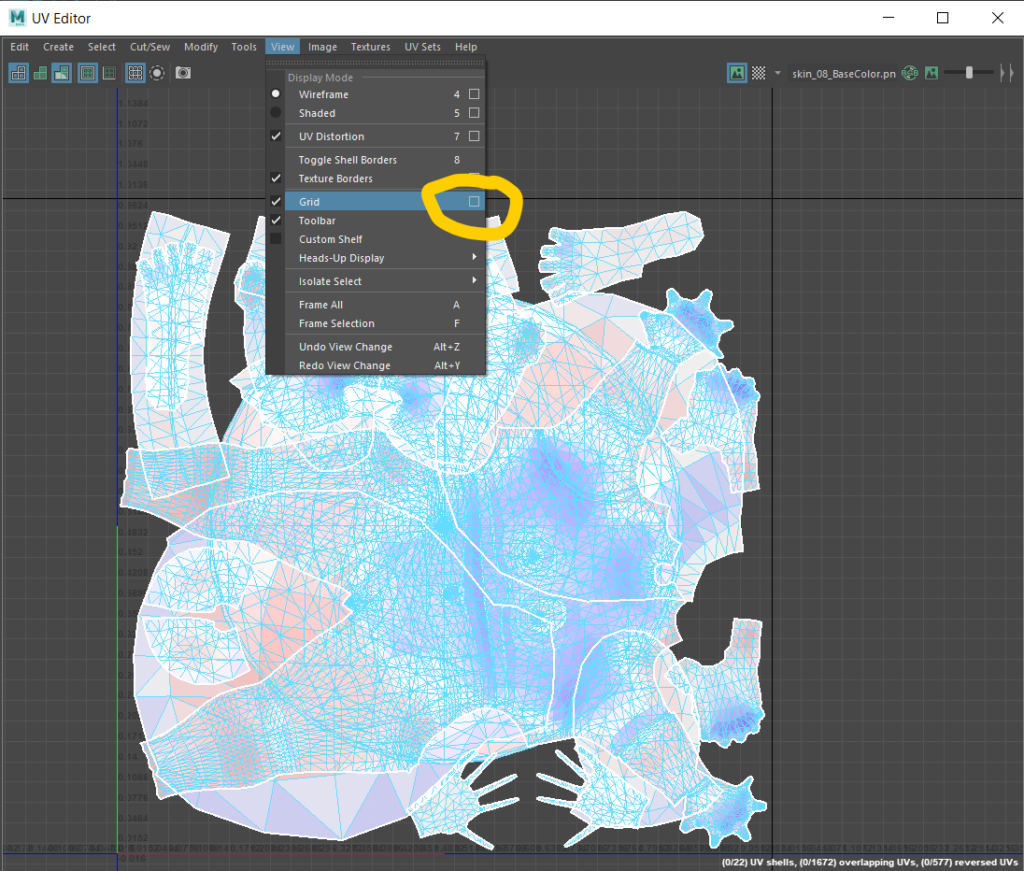
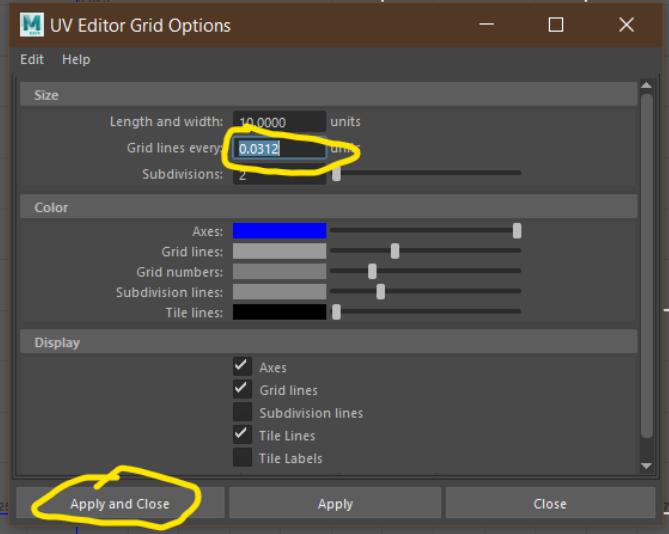 0.0312, you ask? This is 1/32, as we want 32 grid points in our 0-1 UV space (its actually 0.03125, but Maya rounds it)you can find out more

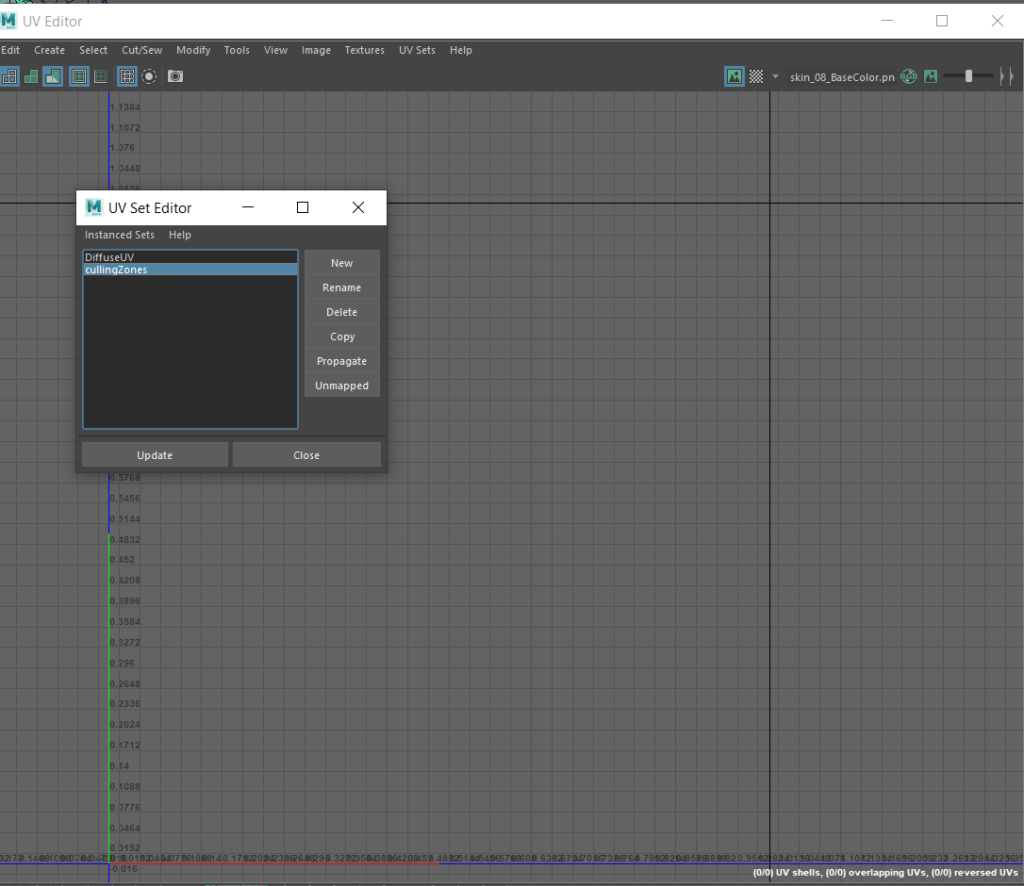
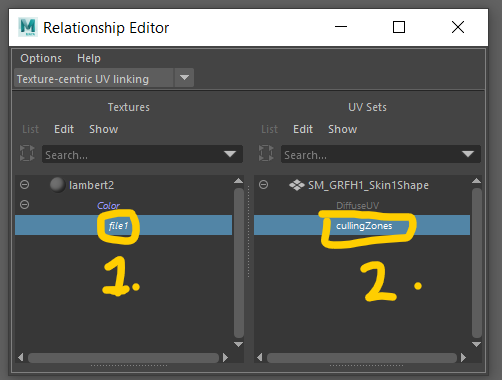
Now we need to create a new UV set. A UV set is called a UV Channel in Unreal Engine 4. It is simply a set of UVs for a vertex. Each vertex can have as many different UVs as you like, and these are store in channels. It is worth noting that the more UV sets you have, the more vertices your graphics card has to process at runtime. For us this is fine, but keep it in mind.
Create a new UV set. It can be empty as we’re going to assign new UVs to all parts of our mesh.
Start by selecting your mesh, and clicking the following:
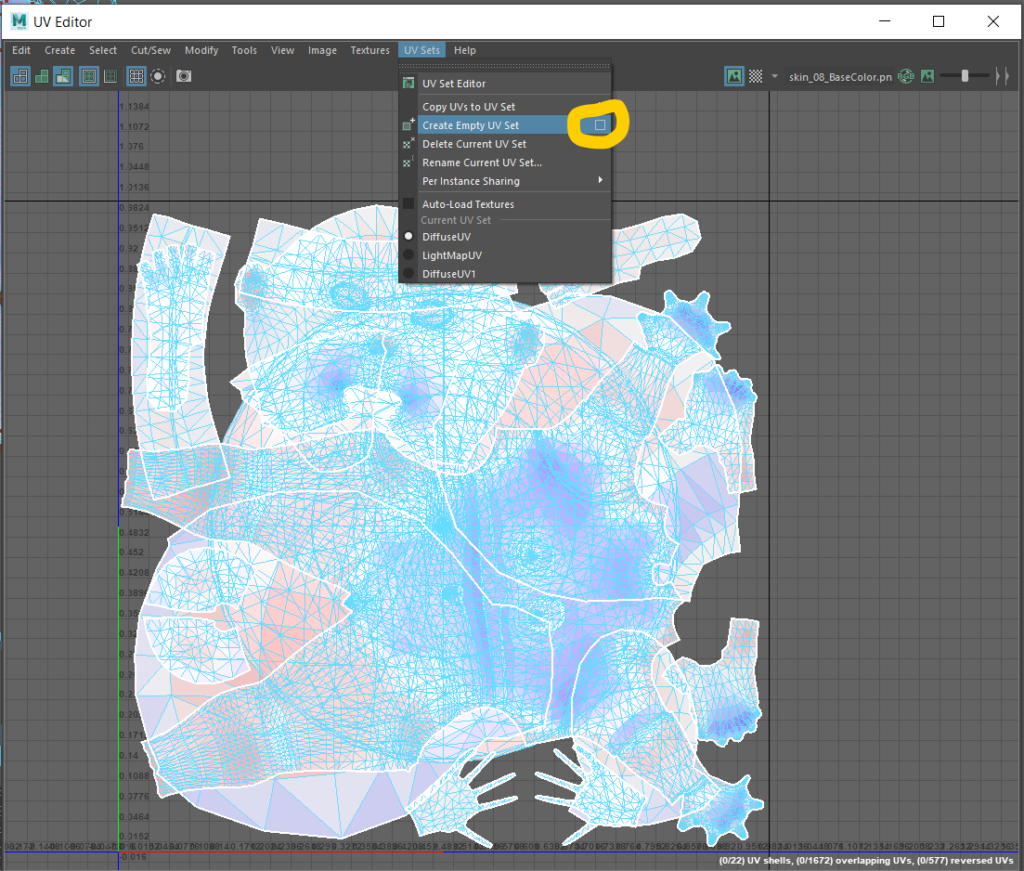
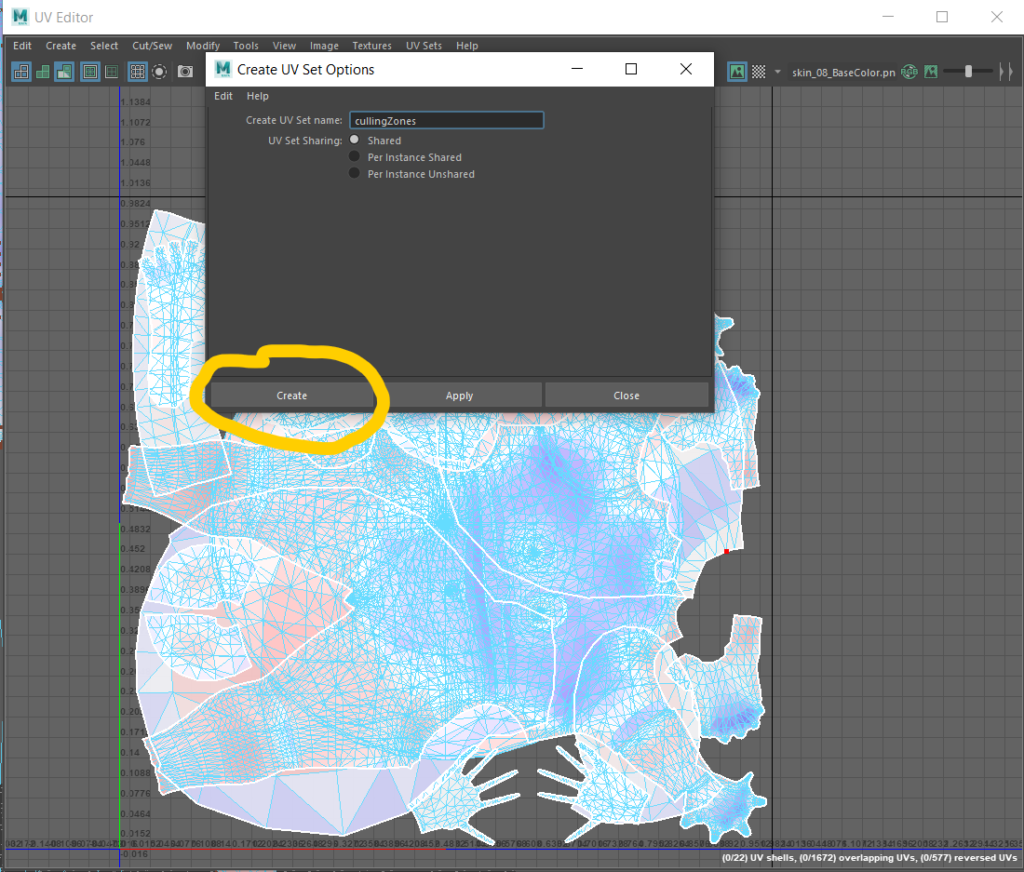
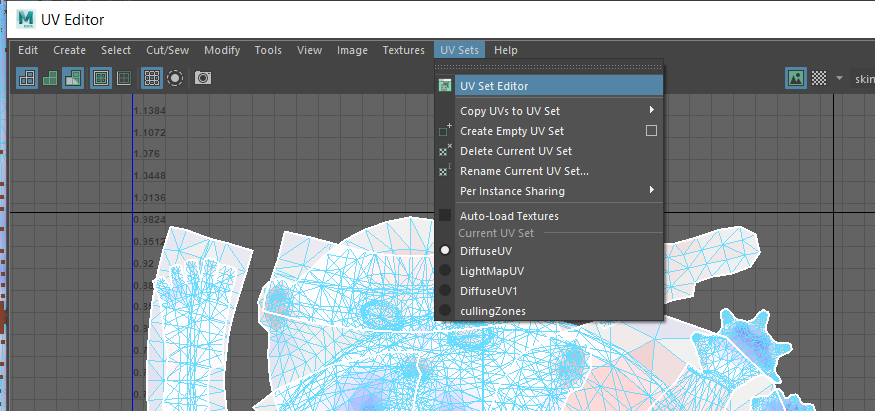
You should now be able to head into UV Set Editor and see your new UV set:
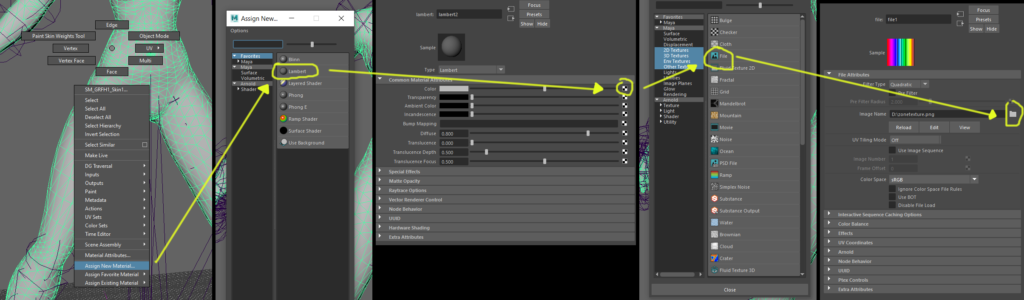
Next we’ll use the following image as a texture. It is just 32 colours, so that as we’re assigning each zone in our UV space we get some clean visual feedback on our mesh:
![]()
Create and assign a new shader (Lambert or Blinn will do). In its Color value, add a new file node and use the above texture.
Turn on textures in your viewport:
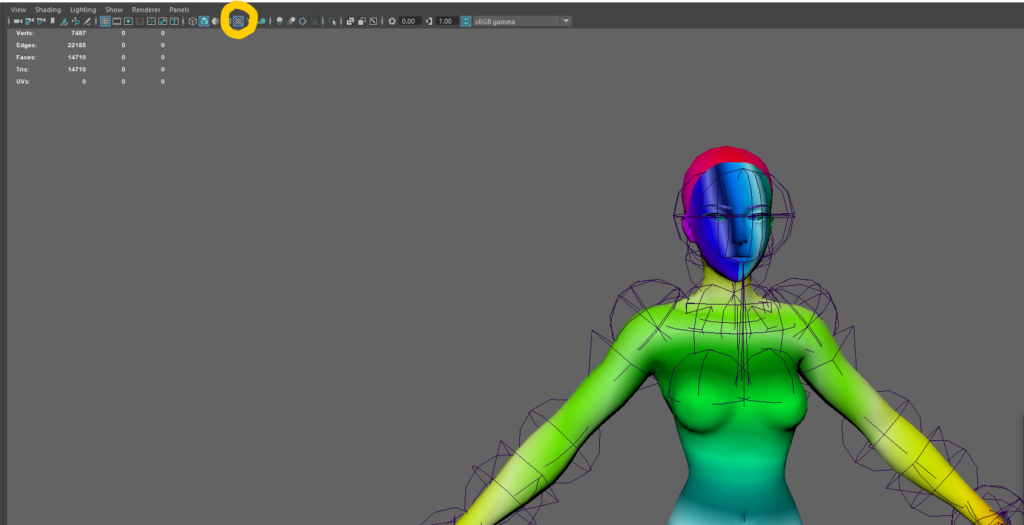
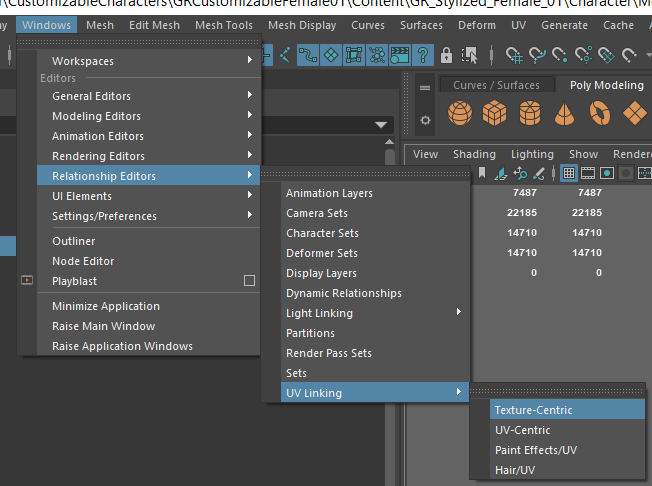
Next we need to be able to see the second UV set in-use in our mesh (by default Maya only displays the first UV set in the viewport):
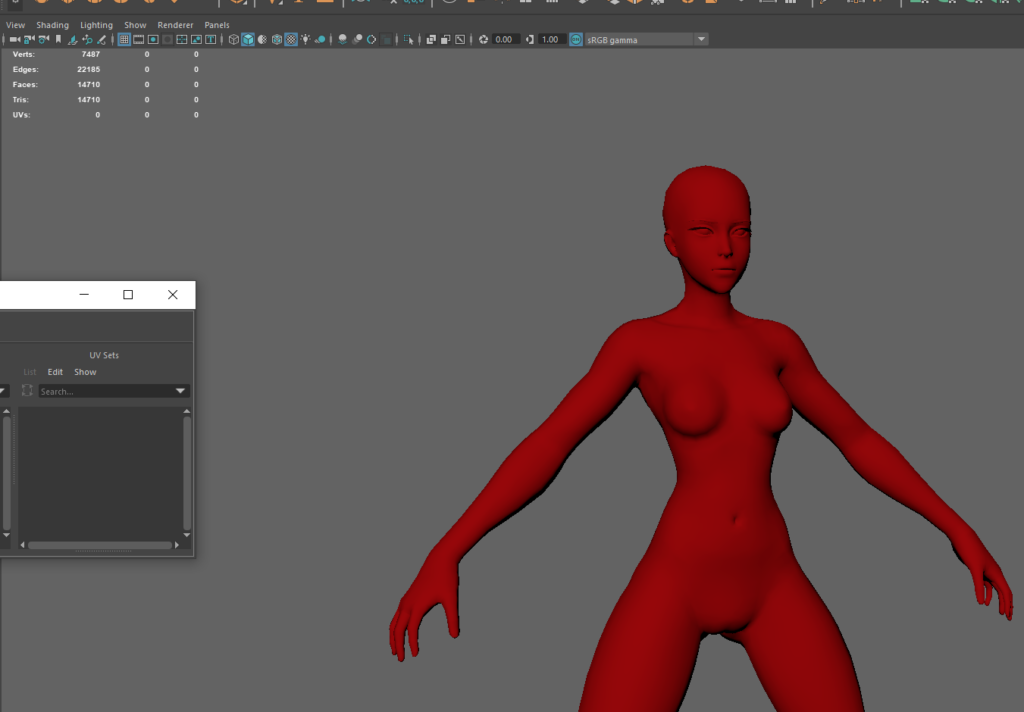
All our UVs are 0,0 in this second set, so we’re all red.
With your second UV set selected, you can now begin UV’ing sections of your mesh.
For this process, simply select each zone of you mesh you want to cull. Then create some Automatic UVs for it. Then scale the UVs down as small as you can manage and make sure they fit inside one of vertical grid columns:
Then repeat for each zone.
NOTE: As mentioned previously, if you’re using UE4, you are limited to the first 24 zones!
But which zones? How do I cut this up?!
Good question – the quick answer is that its up to you. But there are some things to consider:
- Your clothing will need to be designed around these zones – the closer you follow the zones with your clothing, the less clipping issues you’ll have
- Start by looking at your clothing designs and working out the zones you want create
- Define the zones on your base character first
- Your clothing will need to be designed around these zones – the closer you follow the zones with your clothing, the less clipping issues you’ll have
- Start by looking at your clothing designs and working out the zones you want create
- Define the zones on your base character first
Here is how I have approached mine, based on the clothing I’m using (in an ideal world, you split the zones up first, then design your clothing):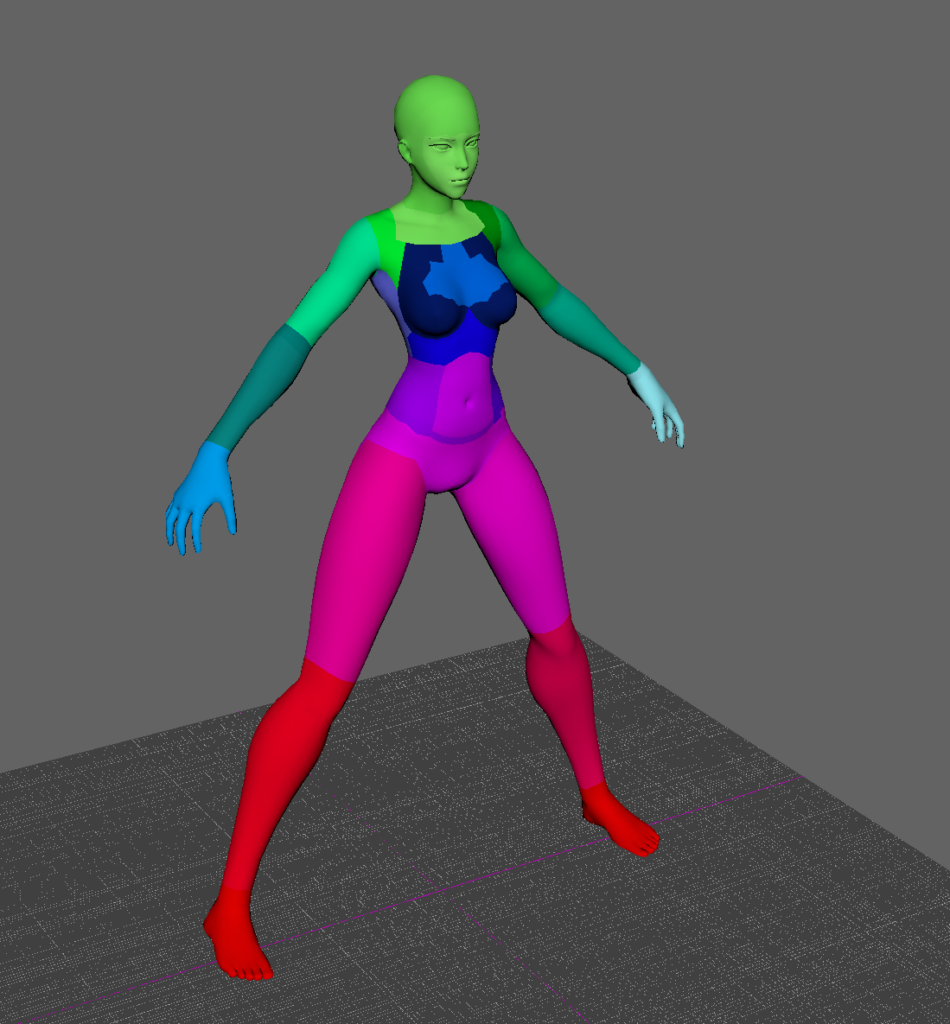
Each color is a unique zone we can dynamically cull
Depending on your clothing you may want to dedicate areas differently. In this example, I’m running just one zone for the neck and face
The next step is crucial:
We need to apply the same zoning to our clothes. This makes things consistent and means we can layer a jacket on top of a tank top (culling the parts of the tank top we can no longer see), and then add the two bitmasks together and apply that value to the character’s skin mesh – it will hide everything both layers of clothing are on-top of!
We need to apply the same zoning to our clothes
add the two bitmasks together
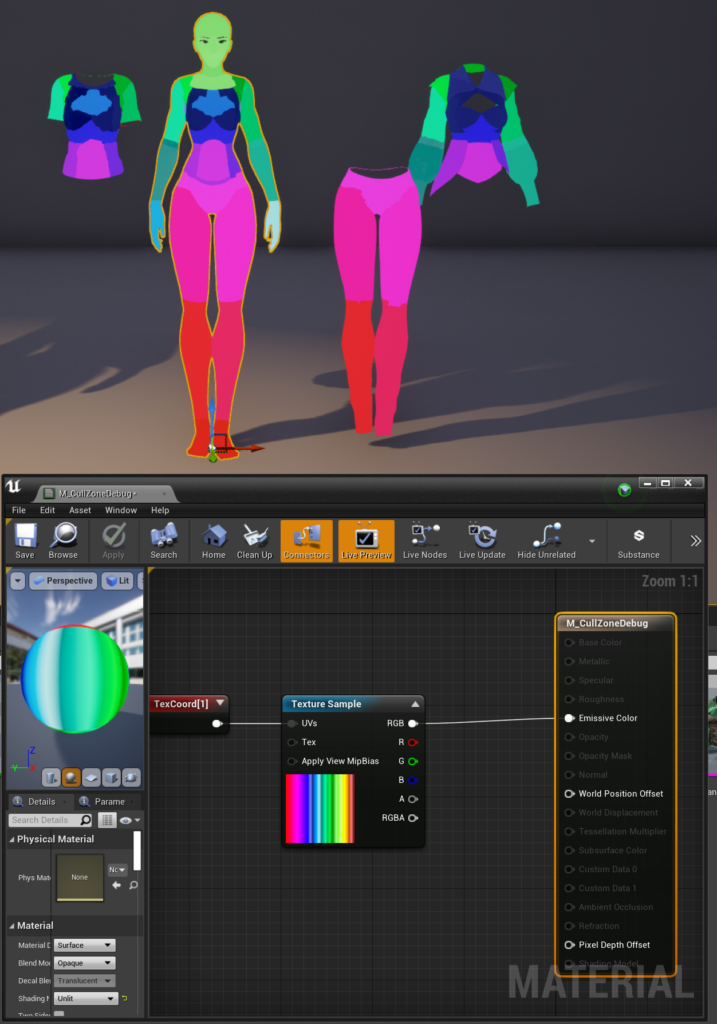
Here is the zoning on some example clothing:
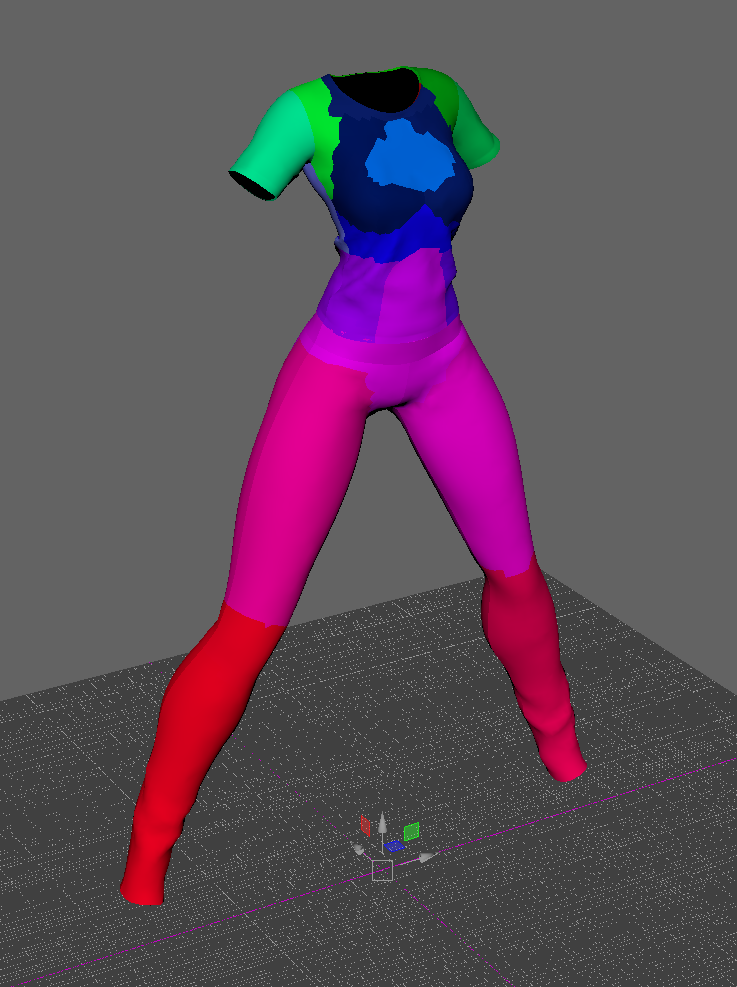
The zoning matches.
FWIW: I’d recommend a close topology match between your clothing and characters if you can manage it than I demonstrate here (time constraints, may redo these assets)
Final step is to export this out to .FBX ready for Unreal Engine 4. I’ve done this here, you can check your zones have come in properly by setting up a Material as below:
Continue on to the next page: